準備
(なし)
デザイン
1. フォーム (Form1) にボタン (button1) を配置します。
2. フォーム (Form1) にボタン (button2) を配置します。
3. フォーム (Form1) にデータグリッドビュー (dataGridView1) を配置します。
4. フォーム (Form1) にバインディングソース (bindingSource1) を配置します。
サンプルコード (C#)
// 名前空間の追加
// (なし)

// コード
private void Form1_Load(object sender, EventArgs e)
{
  DataSet ds = new DataSet();
  DataTable dt = ds.Tables.Add("Computer");

  dt.Columns.Add("メーカー");
  dt.Columns.Add("パソコン名");

  dt.Rows.Add(new string[] { "NEC", "ValueStar" });
  dt.Rows.Add(new string[] { "SONY", "VAIO" });
  dt.Rows.Add(new string[] { "DELL", "Precision" });

  bindingSource1.DataSource = ds;
  bindingSource1.DataMember = "Computer";

  dataGridView1.AutoGenerateColumns = false;
  dataGridView1.DataSource = bindingSource1;

  DataGridViewTextBoxColumn col1 = new DataGridViewTextBoxColumn();
  col1.DataPropertyName = "メーカー";
  col1.HeaderText = "メーカー";
  dataGridView1.Columns.Add(col1);

  BindingSource bs = new BindingSource();
  bs.Add("ValueStar");
  bs.Add("VAIO");
  bs.Add("Precision");

  DataGridViewComboBoxColumn col2 = new DataGridViewComboBoxColumn();
  col2.DataPropertyName = "パソコン名";
  col2.HeaderText = "パソコン名";
  col2.DataSource = bs;
  dataGridView1.Columns.Add(col2);
}

private void button1_Click(object sender, EventArgs e)
{
  bindingSource1.MovePrevious();
}

private void button2_Click(object sender, EventArgs e)
{
  bindingSource1.MoveNext();
}
解説
データグリッドにバインディングソースを設定しています。バインディングソースには事前に作成したデータセットが割り当てられています。但し、データグリッドビューの AutoGenerateColumns を false を設定していることにより、列の自動追加は行っていません。通常はテキストボックスカラムが割り当てられます。
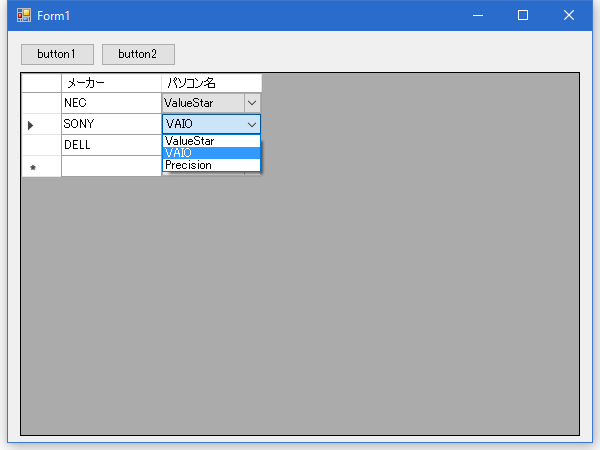
列はテキストボックスカラムとコンボボックスカラムを別に作成してからデータグリッドビューに追加しています。特にコンボボックスカラムは、リストから選択ができるように別のバインディングソースを作成してリスト項目を割り当てています。
ボタンの操作によりカレント行を移動できます。
結果

動作確認環境
Visual Studio 2015 Professional (C# 6.0)